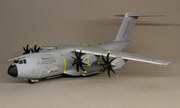
Airbus A400M "ATLAS"
Revell | N. 04859 | 1:144

I fatti
- Marca:
- Revell
- Titolo:
- Airbus A400M "ATLAS"
- Numero:
- 04859 (Anche elencato come 80-4859)
- Scala:
- 1:144
- Digita:
- Kit completo
- Messo in commercio:
- 2014 Nuovo stampo
- Codice a barre:
- 4009803048598 (EAN)
- Confezione:
- Scatola pieghevole (apertura laterale)
- Argomento:
- Airbus A400M Atlas » Elica (Aereo)
Insegne
Airbus A400M Atlas
Airbus A400M Grizzly
 Airbus (1970-now)
- F-WWMZ
2013
Airbus A400M-180 Atlas
 Bundeswehr Luftwaffe (German Air Force 1956-now)
- LTG 62 54+01
2014 - Wunstorf
 Armée de l'Air (French Air Force 1934-2019)
- F-RBAB "Ville de Toulouse"
2014
Contenuto della confezione
Dimensioni:
537x207x63 mm
(21.1x8.1x2.5 inch)
Boxart disegnato da Andrzej Deredos
Genealogia
Revell
Istruzioni
Scaricare 6326Kb (.pdf)
Mercato
No partner shops available
Recensioni in-box
Revisioni esterne
Annuncio pubblicitario
Tutte le recensioni » (7 in totale)
Riviste
Tutte le riviste » (7 in totale)
Commenti
Suggestions for other builders:
1) Consider doing something with the stabilizers/elevators, which connects to the tail, but actually has this flat surface. This flat surface is molded onto the tail, which doesn't look the best, it should be connected to the stabilizers/elevators.
2) Decal sheet has some obvious errors. Also the yellow prop warning on the hull is supposed to be angled to be parallel with the tilted engines for anyone in doubt.
3) I used a nose weight of 30g iirc, at the nose and around the cabin area at the front, the manual suggests 40g. Note: I had the loading ramp closed.
4) Try make sure you get all the four engines tilted properly, so don't sand off too much plastic here and there.
5) The decal sheet have dark grey "A400M" decals on it. It would be important to make the paint lighter than the darker decals. I couldn't figure out if the decals were too light in color or not compared to photos.
1 March 2020, 21:03
Also, I found out that, one can't glue on the wheels, if you already glued on all the other parts for the landing gear and also all the aircraft hull parts.
What would work, is gluing on the wheels + the next big part and put those two things into the landing gear bay.
Once can ofc glue it all together, but that would make painting the wheels tricky, unless you want to put masking tape all over each wheel, which seems tedious.
2 March 2020, 09:54
Tip: If needing to sand the clear parts for the tiny windows, it is a very good idea to leave the small clear parts on a part of the sprue, and sand the backside with a metal file, and finish with a polish stick, quick and easy. Also much easier to hold in your fingers that way.
10 February 2020, 13:10
Better watch out for those sink marks. Make sure you add some putty around all the windows and sand down before starting to add any primer. :|
I think my brain somehow ingnored them, maybe because my brain went "that can't be sink marks, not around all the windows, that would be silly, really around all the windows?". Or "I am already busy with those other sink marks over here, I will have to ignore this."
9 February 2020, 09:42
Having worked in a plastic injection molding factory that's a result of not enough pressure in the shot.
Obviously the machine operator hasn't informed the die setter of the issue.
Poor quality control
Total lack of care about the finished product
9 February 2020, 09:55
The issue seems to be where the plastic hull is at its thickest, because on the inside, more plastic is protruding. Would be nice to know if this is preventable, or not. It sounds like maybe it is preventable, by being more careful working with the injection mold machine (or maybe in the configuration of it).
The sink marks around all the windows aren't deep, but just enough deep to annoy.
9 February 2020, 10:16
It'd be the pressure of the shot.
Low pressure means not enough material is in the mold space.
Plastic cools and shrinks. This is why it's happening where it's thicker.
Hopefully it was detected during the run and not all kits are the same
9 February 2020, 10:42
Looking at the kit again I should correct myself. Six of ten windows have noticeable sink marks. I've already added primer and some color, but I think I will just bite it and sand off the paint and add the putty. :|
Thanks for the feedback. 🙂
9 February 2020, 12:39
Progetti
11 immagini
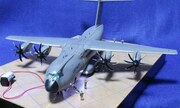
Revell's A400M military transport in 1:144 scale
1:144
My favourite photo I think. Happy about thinning the wings and stabs on the rear side.
3 immagini
A400M BAF 1/144: the build
1:144
test print decals on regular paper, size seems alright. serial next to the door seems a bit big, but any smaller and it ...
Progetto: Airbus A400M "Belgian Air Force"
All projects » (5 in totale)
Galleria
Tutti gli articoli » (9 in totale)
Materiale di riferimento

Atlas A-400M In Service with Air Forces Around the World
Aircraft in Detail N. 019
Robert Pied, Nicolas Deboeck
2022 Tutti i walkaround (immagini dei dettagli) » (4 in totale)
 database di modellazione su carta | gestore della mia scorta


