
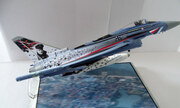
Eurofighter Typhoon "Bronze Tiger"
Revell | No 03949 | 1:48

Факти
- Марка:
- Revell
- Наименование:
- Eurofighter Typhoon "Bronze Tiger"
- Номер:
- 03949 (Листван и като 80-3949)
- Мащаб:
- 1:48
- Тип:
- Пълен комплект
- В продажба:
- 2016 Нови декали
- Баркод:
- 4009803039497 (EAN)
- Опаковка:
- Сгъваема кутия (странично отваряне)
- Тема:
- Eurofighter Typhoon » Реактивни самолети (Самолет)
Маркировки
Eurofighter Typhoon
 Bundeswehr Luftwaffe (German Air Force 1956-now)
- TaktLwG 74 30+09
Май 2016 NATO Tiger Meet - BA Zaragoza
RAL2013
Хронология на продукта
Italeri
Revell
Hasegawa
2000
2001
2006
2007
2010
2016
2020
2022
Инструкции
Изтегли 10414Kb (.pdf)
Пазар
No partner shops available
Преглед на съдържанието
Външни прегледи
Реклама

Преглед в кутията
kitreviewsonline.de

Преглед в кутията
IPMS Deutschland

Преглед в кутията
Modellversium

Преглед
Revell Forum
Всички отзиви » (7 общо)
Списания
")
")
")
Всички списания » (3 общо)
Проекти


All projects » (11 общо)
Галерия

Всички статии » (33 общо)
Справочен материал
")
")
Всички книги » (18 общо) Всички walkarounds » (22 общо)